Most people see their finished cabinets for the first time and say the same thing: "Eh, why doesn't it look like the design?"
It is a fair question. You paid for a drawing, you looked at it for weeks, and now the real thing is standing in your room and it is not quite the same. This article walks through one real job, a condominium unit at MET 1 Residences in KL Metropolis, where the owner came to us with a full set of 3D renders and asked us to build from them. We put each render beside a photograph of what was installed.
The short answer: most of the differences were not things we could not build. They were decisions the owner made after the drawings were done.
1. Colour: the render is only a reference
A render colour is a picture on a screen. The real colour is picked later, from a physical laminate sample, usually standing in the room under its own light. Once owners hold the real sample, they often choose something else.
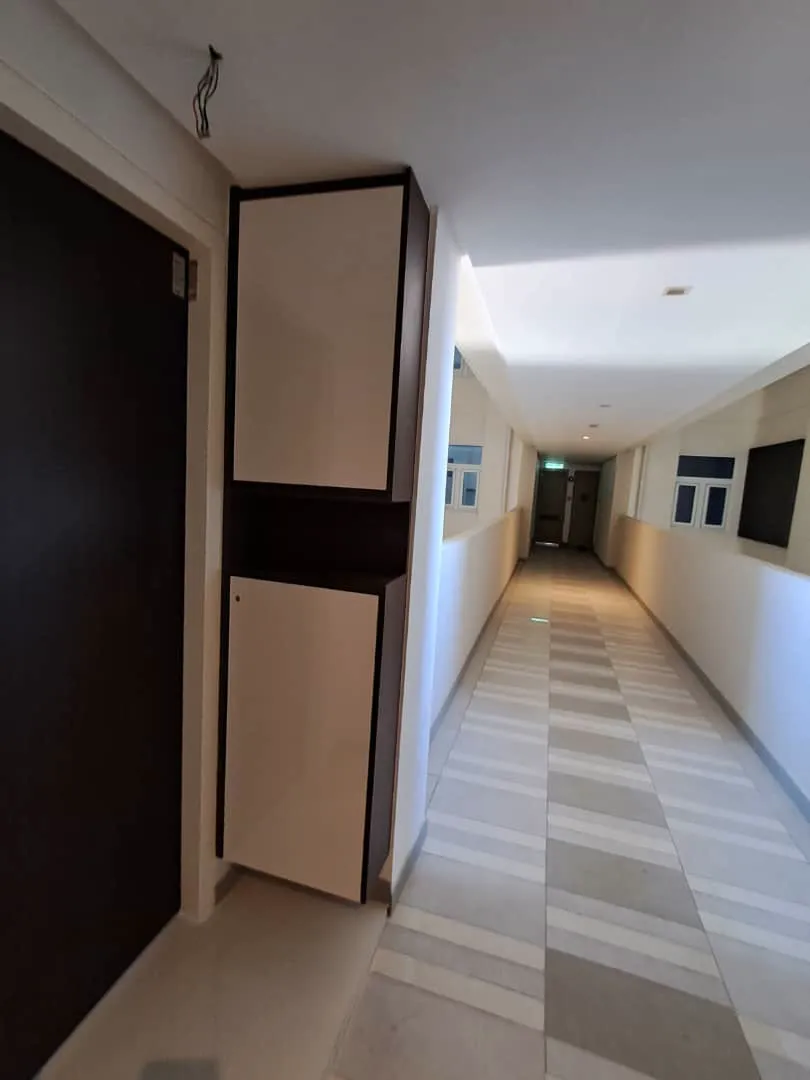
At MET 1, the render drew the shoe cabinet beside the front door in a light fabric texture. The owner chose off-white doors with a dark timber trim instead. In the common bathroom, the owner picked black for the vanity top and the open shelves on either side of the mirror. It ended up as the darkest corner of the whole unit, and that was the owner's choice.
2. Scope: the owner decides how much to build
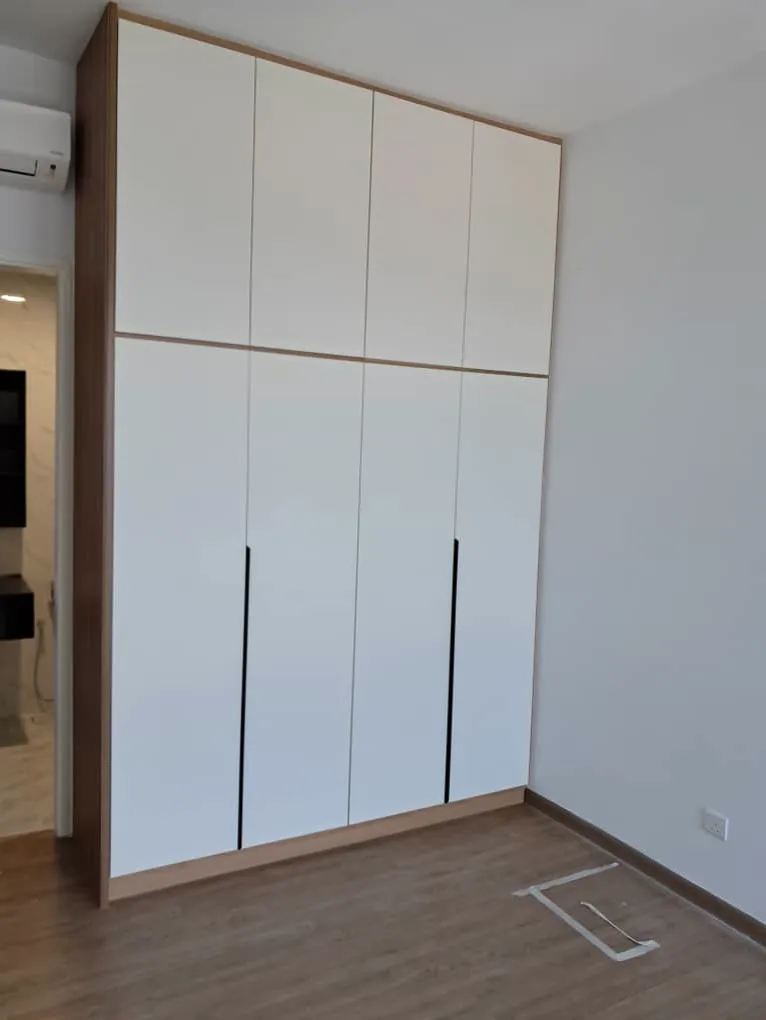
The master bedroom render showed three things: a wardrobe, a headboard with a light strip, and a dressing table. After talking it through and seeing the price of each piece, the owner decided to build only the main wardrobe for now.
That is not a job left unfinished. It is a sensible way to spend: build what you need first, and leave the rest until you have lived in the room and know you still want it. A render shows everything that could go in a room, and it is easy to forget that every piece in it has a price.
3. Details: they keep coming after installation
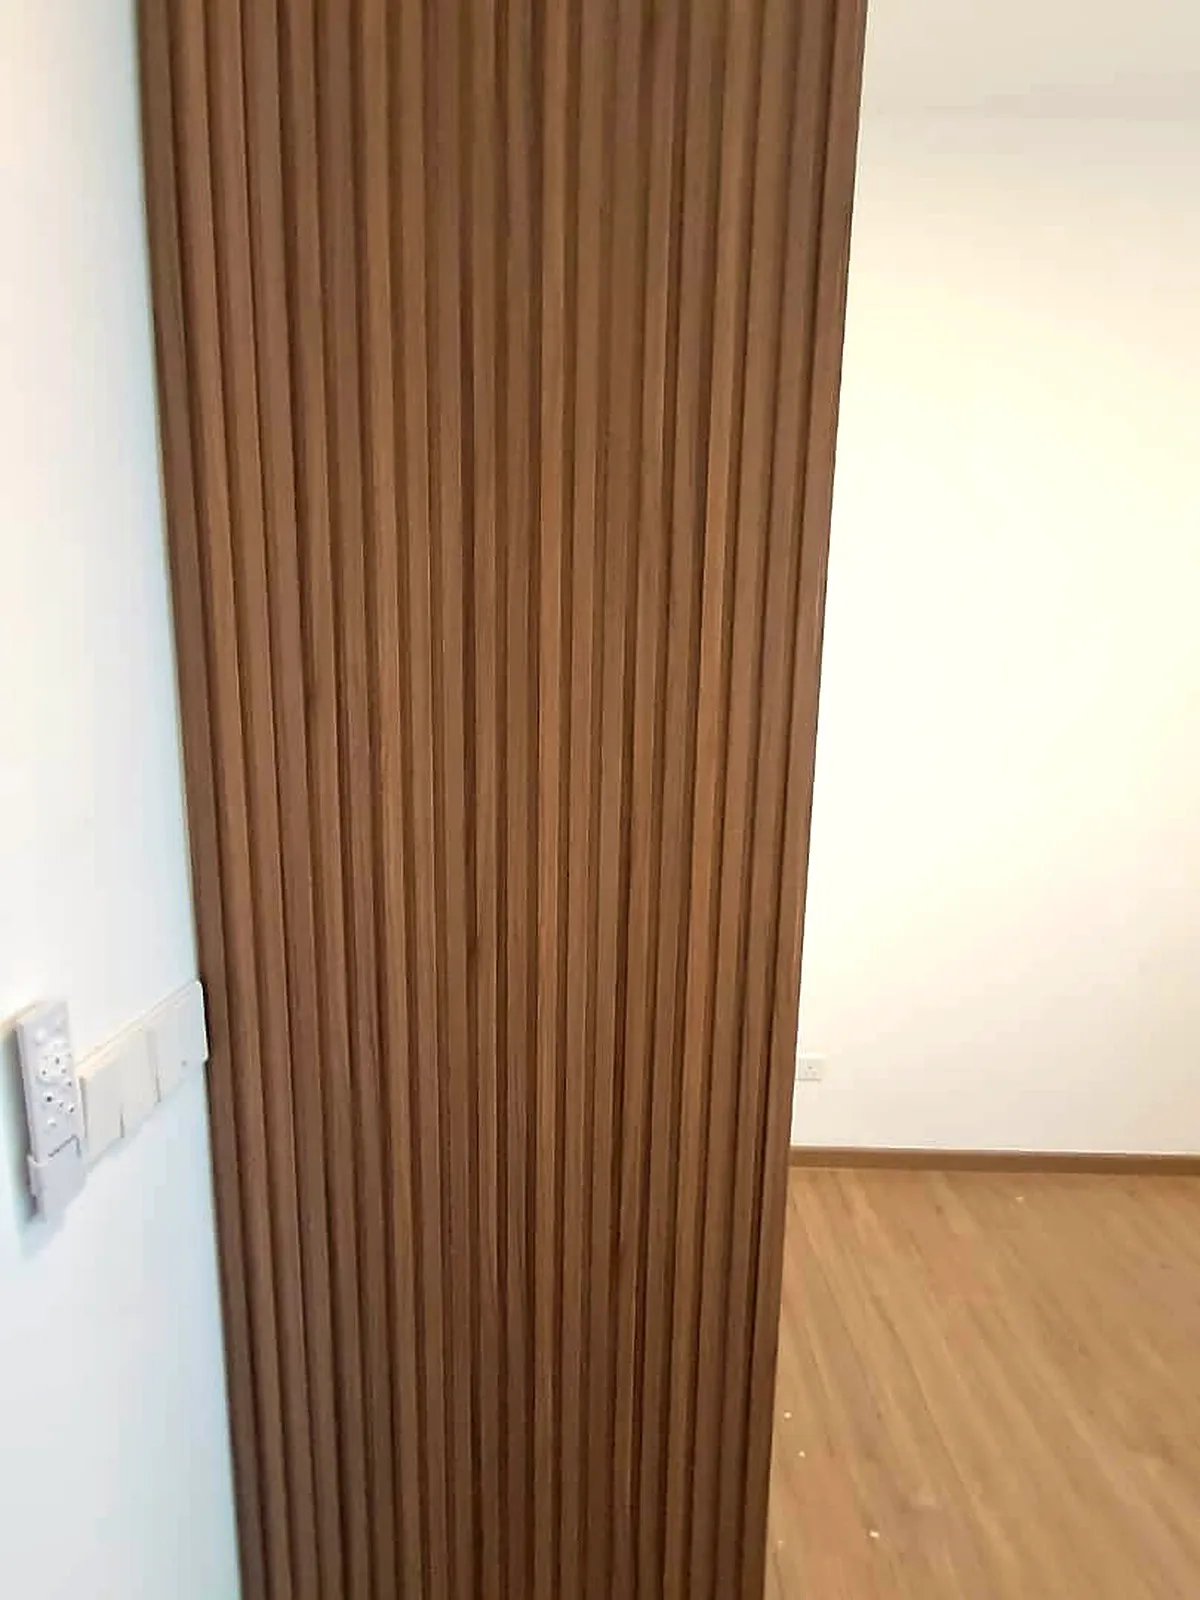
In the second bedroom, once the wardrobe was in, the owner stood in the room and did not like how its open end looked. The render had nothing there. We went back and closed it with a timber slat panel.
This kind of thing is ordinary. A room looks different once a full-height wardrobe is standing in it, and some decisions can only be made then. An installed cabinet is not the end of the conversation. On this job, measuring, building and installing were done by the same pair of hands, so a change like this was a message and a return visit rather than a new contract.
The one that came out closest
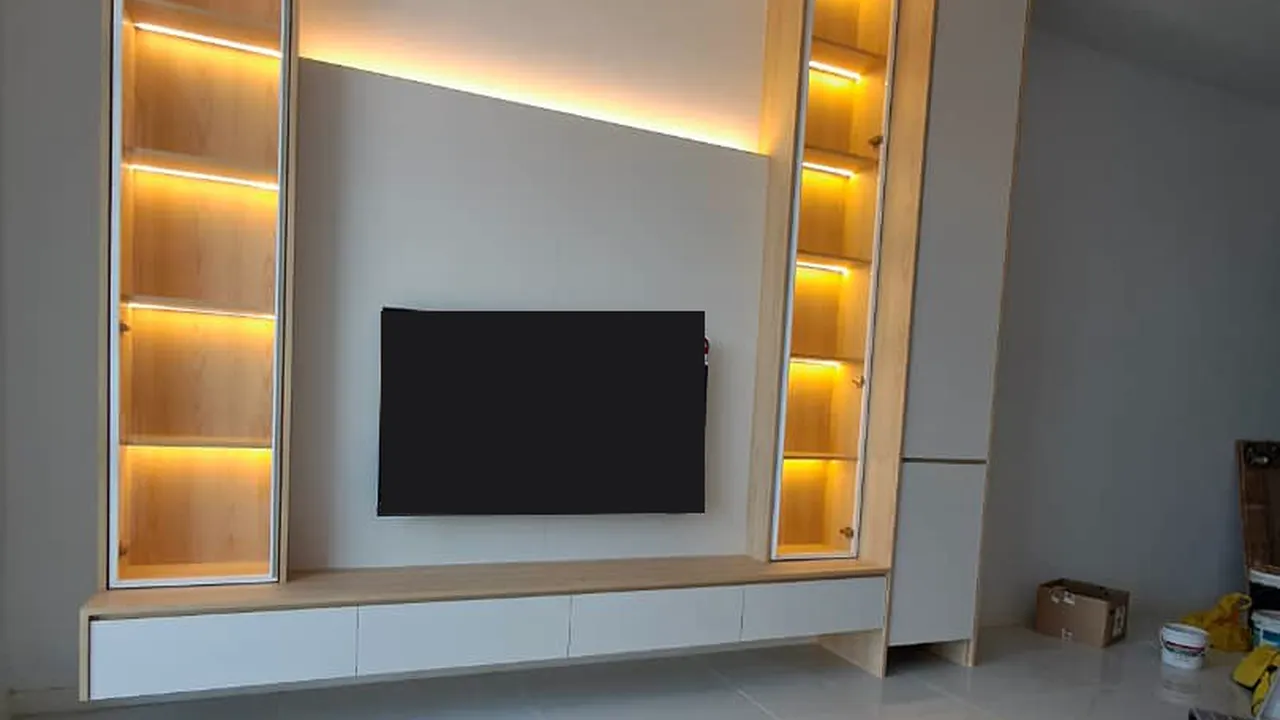
The living-room TV wall is the piece that came out nearest its render: a floating console, two glass display towers with lighting on every shelf, and an LED cove above the panel. When the owner keeps the design and the colours, the result follows the drawing closely. When the owner changes them, the result follows the owner.
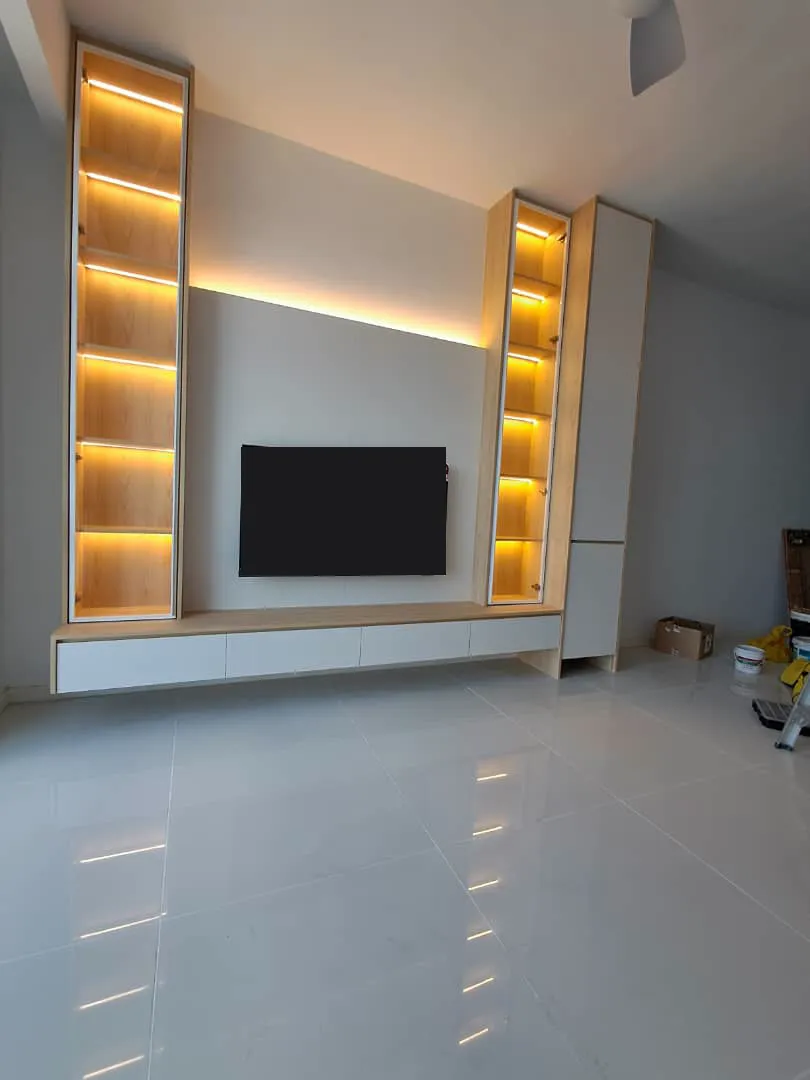
On the project page you can drag a slider across each of the four rooms and see the render and the photograph in the same frame.
What about the materials?
People ask this more than anything else, so here it is plainly. Every carcass in this unit is plywood, and every surface is laminate. That is all there is to it. If you want to know why we use plywood for the carcass, our material guide goes through it.
How to use a render well
- Treat it as a reference, not a contract. It is the starting point for a conversation about colour, scope and detail.
- Pick colours from real samples. Hold the laminate against your wall, in daylight and at night, before you confirm.
- Price each piece separately. Then you can decide what to build now and what can wait.
- Leave room for one more decision. Some details only make sense once the cabinets are standing in the room.
If you have a 3D design and want to know what it would take to build, send it to us on WhatsApp with the room measurements. We will go through it piece by piece with you, at our wardrobe and custom furniture prices, made in our own Seremban workshop.
Common questions about this topic
Can a carpenter build exactly what my 3D render shows?
Usually close, but rarely identical. A render is drawn before the real laminate colours are chosen and before the scope is priced, so colour, scope and small details tend to shift once the job is real. Most of those changes are the owner's own decisions, not things the workshop could not make.
Why does the laminate colour look different from the render?
A render colour is a picture on a screen. The real colour is picked later from a physical sample, under the room's own light, and the owner often chooses a different shade once they hold it. Ask to see the actual sample against your wall before confirming.
Can I add something after the cabinets are installed?
Often, yes. A slat panel, an extra shelf or a closing piece can be made to match and fitted on a return visit. It is easier when the same people who measured and built the job come back to do it.